Podcast Recording Tips
You’ve chosen a topic, defined your show, created a plan, committed to yourself and your audience that you’re going to start a podcast, but how do you get started with recording? If you’ve never attempted to record yourself it could be a little intimidating. Don’t worry, it is easier than you might think once you’ve armed yourself with just a little basic knowledge on the gear you need and how to operate it.
Once you've got some podcast equipment and secured a quiet room, you’re ready to get started.
Step 1. Plug your audio interface into your computer, make sure the interface is powered on.
Step 2. Attach your microphone to your stand or boom arm, if using a shock mount or pop filter, attach those as well.
Step 3. Connect one end of your XLR cable to your microphone and the other to input #1 on your audio interface. If you have more than one microphone for additional guests, connect them to the additional inputs on your interface.
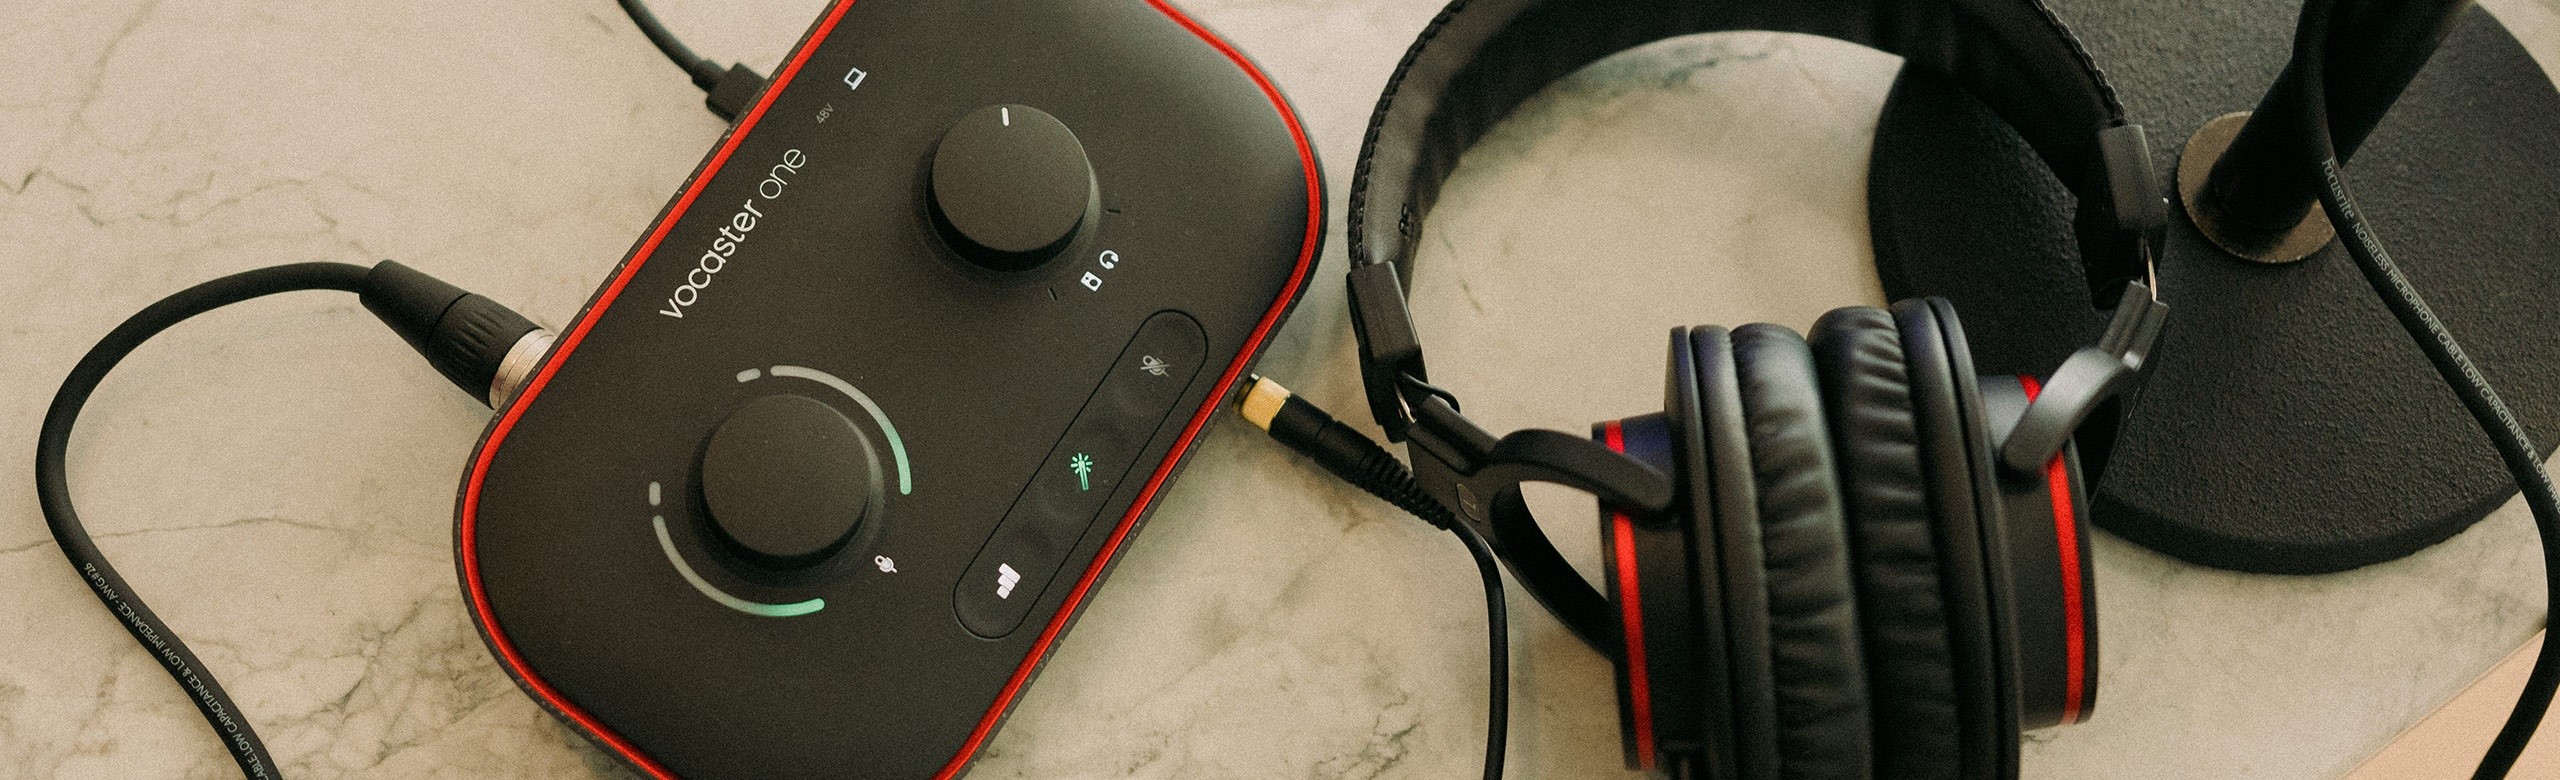
Step 4. Plug your headphones into your audio interface. With Vocaster you can control your headphone volume easily and adjust whilst recording.
Step 5. Open your chosen recording application and create a new session. Be sure to name it something that is relevant to the show you’ll be recording such as: 2022–06–01 My Podcast Name & Topic – be sure to save it in a location you’ll remember.
Step 6. Make sure your interface is chosen for the input and output device in your recording application’s settings.
- Hindenburg – this can be found by navigating to the preferences menu, selecting the Audio tab, then choosing your interface for both Playback and Record.
- Audacity – this can be found in the dropdown menus in the top bar
- GarageBand – this can be found by navigating to the preferences menu then choosing the Audio/MIDI tab and selecting your interface as both the input and output device.
Step 7. Adjust the gain setting on your audio interface. On a Focusrite Vocaster, Scarlett, or Clarett it is very easy to set your microphone level; turn the gain knob clockwise while speaking into the mic and when it glows red, turn it back counterclockwise just until it doesn’t glow red anymore, that should be a perfect level. With Vocaster, this is even simpler by using Auto Gain to set the microphone levels for you.
Step 8. Now, take a deep breath, clear your throat, drink some water, and hit record.
Step 9. When you are done, press stop to end the recording.
Step 10. Be sure to save your session when you’re done recording, you don’t want your system to crash and lose a perfect podcast.
Step 11. Export your audio to upload it to your podcasting host.
- Hindenburg – You can publish directly to your podcast host with Hindenburg. Search Publishing Your Podcast with Hindenburg in YouTube to find our video tutorial on FocusriteTV.
- Audacity – Click the File menu, hover over Export, choose the file type you’d like to export, (WAV is higher quality and larger file size, MP3 is lower quality and smaller file size), choose where you’d like to save the file and click on the save button.
- GarageBand – Click on the Share menu, choose Export song to disk, name the file, choose the location you’d like the file saved (best to save in the same place you saved your complete session in step 5), choose MP3 or WAVE, (WAVE is higher quality and larger file size, MP3 is lower quality and smaller file size), choose file quality (High Quality 192 kBit/s), click Export.
Step 12. Upload your file to your podcast host.
Step 13. You’re done, it’s time to promote your show!
Things to keep in mind
Proximity effect
Avoid getting too close to the microphone as it will cause a rumble in the low-end frequencies of your audio on some microphones, this is called the ‘proximity effect’. Having a good distance (but not too far away) between you and your microphone will give you a good voice recording and sound.
The pushing of air
If you own a pop shield or your microphone has a grille this issue will be avoided, certain letters in our speech push the air outwards more than others. ‘P’ is the most common, with ‘B’ also sometimes victim of this in the English language. If you don’t have a pop-shield or grille for your microphone, you may hear on your podcast recording the air hitting the microphone.
Library-like space
In addition to making sure you’re in the zone for your podcast show, it’s important to have a quiet space to record in so that there aren’t any unwanted noises being picked up by your microphone. Closing windows and doors, avoiding busy and loud spaces, and making sure to keep phones silent will help you create a library-like space to record in. Oh, and be sure to switch off Alexa and Siri whilst you’re at it…
Staying put
This might not always be avoidable, however keeping roughly the same distance to your microphone during recording your show, not changing spaces, will give you a consistent show in terms of volume, sound, and quality.
Learn More
Getting Started: Podcast Hardware There are three key pieces of podcasting equipment needed for you to get started, which will make a minimal, yet perfectly formed, podcast setup.
Getting Started: Podcast Software From DAWs, podcast specific recording software, and music and sound platforms, there is a wealth of software available to record, mix, and finalise your show.
Getting Started: Additional Podcast Equipment To get a studio quality podcast recording, you will need to consider headphones, microphones, pop shield, and sound treatment.